After about five minutes of this, the ship pulls up in front of a weird-looking planet covered in red and pink hearts, with castle towers and trimmed hedges sticking out at odd angles. This is Wonderland. How fitting that the first place Junior, @%$#!!!, and Goofy visit on their trek through this drug-induced game is the world based on the most cracked Disney film ever. The three of them depart from the gummi ship and float downward through what I presume is the rabbit hole. Junior and @%$#!!! land okay, but Goofy takes a header into the floor. I think he’s probably taken a lot of those in his lifetime. Immediately after they land, the White Rabbit runs onscreen out of nowhere, holding his watch and wailing in a nasal voice about his tardiness and how he feels about it. You guys know the drill, I’m sure. Junior follows him, because, hey, does he have anything better to do? Oh yeah, look for Token and Riku. Not that that’s a priority. At this point I hug my Riku action figure and lament Square’s decision to make him the evil rival and not the hero.

I did not need to hear that.
The group trails the White Rabbit through a series of doors that decrease in size each time–because we’re supposed to see how wacky and interesting Wonderland is from the funhouse-style doors–and turn up in an area known as the Bizarre Room. The paranoid and frantic White Rabbit runs through a small door on the opposite side of the room. Junior wonders aloud how to get through since it’s too small, and the large doorknob answers that he’s too big. All three of them jump back in shock since the doorknob is talking, as if they haven’t already encountered strange creatures like the Purple-Helmeted Warrior and Wakka. The doorknob yawns and berates them for waking him up. It’s quite the dickhead, for being a brass fixture, so it will now be known as the Knob. The Knob, before going back to sleep, suggests they drink from the bottle on the table. Junior follows the advice and takes a swig from one of the jars. Of course, when he drinks, all three of them somehow shrink down to munchkin size. The game designers sure are batting a thousand in this recap, aren’t they? After fighting a host of Heartless fire mages on the floor, Junior, @%$#!!!, and Goofy proceed through a hole behind the bed to the next area.
Before we get to that, though, I feel the need to go on a tangent, so humor me. In the first hour of the game, @%$#!!! stresses the importance of being incognito in each world they visit. Thus, when he and Goofy arrive in Traverse Town, their clothes are different from their Disney Castle attire. (And what is up with that zippered beret @%$#!!! wears? He looks like he just left a gay roller disco.) Yet this idea only seems to pop up when the character designers feel like it. Yeah, maybe they need no costumes for Wonderland because Wonderland is full of things that make no sense, as we’ll soon see. But where are the togas in Olympic Coliseum? The loincloths for Deep Jungle? The belly dancer outfits for Agrabah? …Okay, I don’t want to see any of that. But some kind of consistency in this game, any at all, would be nice. Game designers? Please?
All right, back to the game. Junior and the Gang enter a courtyard bordered by tall hedges. Past a group of anthropomorphic playing cards (?!) standing guard, a small blonde girl is standing before a large woman with a tight brunette bun sitting at a judge’s bench. The White Rabbit rushes in, pulls a trumpet out of his ass (or somewhere, I don’t know), and announces that the Queen of Hearts is presiding over this trial. Blondie, whom we know is Alice, wants to know what the hell she did to warrant a trial. The Queen tells Alice she’s guilty because the Queen said so. I can’t help but be reminded at this point of Rosie O’Donnell hypocritically cornering and bullying admittedly horrible gun enthusiasts like Tom Selleck on her equally horrible talk show. This similarity, combined with the Queen’s unfortunate physical resemblance to Ms. O’Donnell, means that she has a new nickname. Queen Rosie will have none of Alice’s protests that she’s done nothing wrong. Junior, who’s been observing all this, wants to help, but @%$#!!! holds him back, since that would be meddling, and Lord knows they can’t do that. Even though the entire point of this freaking road trip from hell is to meddle. Whatever. Queen Rosie finds Alice guilty and sentences her to beheading for the crime of attempted theft of the Queen’s heart. That sounds so corny I could barely stand typing it. Of course, the “heart theft” part of the deal means it’s now okay to stick their noses in Wonderland’s business, so Junior rushes to Alice’s side and insists he knows who the true culprit is. Her Royal Bitchiness sends Junior to find proof of his claim and locks up Alice in the meantime. Detective!Junior and his assistants go through a side exit and into the Lotus Forest.
Inside the forest, the first image Junior sees is a disembodied purple cat head. No comment. The Cheshire Cat’s body appears to their left, reclaims its head, and he starts to talk in riddles, since no one in this game can stand making any kind of sense. Basically, the cat tells our boys that there are four pieces of evidence to be found around the area: three are easy to find, one is more difficult. That means squat to me, since I have a wondrous artifact known as the strategy guide, an artifact without which I would never get out of this godforsaken hellhole known as Wonderland. After the cat leaves, the group is first charged with defeating a host of Heartless monsters. All of them make a most satisfying squelching noise when they die, which makes me less bitter about having to run all over the forest just to collect the munny, MP, and HP that explodes violently from their carcasses.
Isn’t he a little young for Viagra?
The first piece of evidence is found in a nearby alcove, daintily presented in a pink-and-red gift-wrapped box. How nice of the Heartless to leave their evidence (the Footprints) looking so lovely–I have to wonder at this point if Squally’s working for the other side, since no one else we’ve met up to now has that good a decorative touch. He must be their Official Gift Wrapper. In that same area, Junior hops up on some mushrooms (no, not like that–that would be the game designers) to reach a doorway inside a tree trunk. This takes the boys back to the Bizarre Room. They fall from the ceiling to the top of the brick fireplace, where another Squally Gift Wrap Special awaits them. This one contains the Stench. How you can trap a bad smell in a box is beyond me, but I should probably give up any remaining hope I have for this game to make sense right now. Back down to the floor of the Bizarre Room, then back through the Courtyard into the Lotus Forest. Yay, the Heartless enemies I’ve defeated reset every time I exit and enter the area. It is more munny and experience, though, so for once I won’t bitch. Junior jumps up on some more magic mushrooms and reaches a platform with Effeminate Gift of Evidence #3, the Antenna. Immediately after finding this Junior opens a few chests; notably, one containing three of Pongo and Perdita’s lost Dalmatians. I thought the puppies just got lost; I don’t recall hearing anything about Cruella DeVil kidnapping them and stuffing them in treasure chests. This game is just getting weirder and weirder.
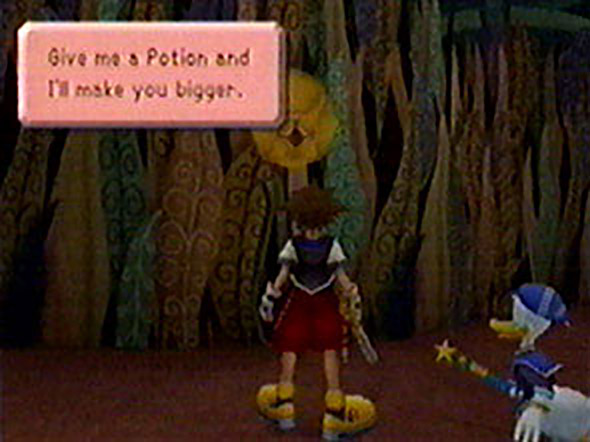
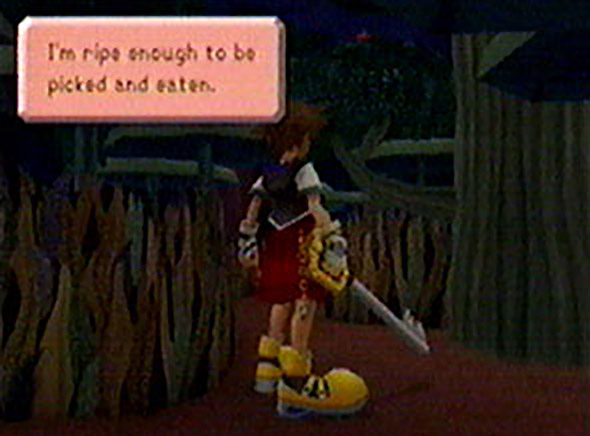
One more box of evidence to find, but to get it, Junior has to talk to one of the large flowers around the forest. Most of them ask for items in exchange for better items, but this one, after it’s given a potion, will make Junior normal-size again. Since I have to, I take the flower up on its offer, and now Junior towers over the rest of the forest. He does several random things that the strategy guide tells me to have him do, like pushing down the large tree trunk and attacking the middle tree to make it spin. This opens up the way to the final piece of evidence. At least, I hope it does, or I’m going to feel like an idiot for wasting that potion on the flower. But sure enough, when Junior returns to small size by eating an acorn from the tree branch (sigh), the layout of the forest has changed enough to open up another path to the Bizarre Room. This time our heroes land on a faucet sticking out of the wall, and have to jump to their right to a ledge. There Junior finds the final pink-and-red box, containing the Claw Marks. How, exactly, do any of these four things, found nowhere near wherever the crime scene was, prove that Alice is innocent and the Heartless are guilty? I guess if I were smoking crack right now I’d be able to plainly see the answer to that question, but I’m not. Sucks to be me, I suppose.
A pedophilic acorn. Now I’ve seen everything.
Back on top of the faucet, the Cheshire Cat reappears to congratulate me for being smart enough to follow the strategy guide and get all four pieces of evidence. Don’t I just rule. After some more strange ranting, he then gives Junior the ability to cast Blizzard. This is great, because now I can wipe out a lot more Heartless fire mages, but I also have to hear Junior constantly say “Deep Freeze” in this really wanky voice. Is absolutely everything in this game a mixed blessing? Alas. Back to Queen Rosie’s Castle, to save Alice’s head.
Before presenting the evidence to the Queen, Junior talks to Alice. For being the indignant, proper English girl, she’s pretty dumb. She poked her head into a rabbit hole and ended up here. Goofy and @%$#!!! take this to mean she’s from another world, and that perhaps a ship isn’t required to travel between them. Alice says, “What do you mean, ‘another world’?” making me think she could very well be the only person in this game who doesn’t know about that little detail. After that she just blathers on about not wanting her head lopped off, so Junior leaves her be and presents his four pieces of “evidence.” The four pink-and-red boxes magically appear before the Queen. She says, “Well, that’s certainly a lot of evidence, but I’m still not impressed.” I think she’d be even less impressed if she saw what the evidence was. Queen Rosie presents one more pink-and-red box, containing her own evidence that Alice is guilty. Squally’s gift-wrapping business looks like it’s making a mint. The Queen scrambles the boxes and tells Junior to choose one to help her determine her verdict. Junior whines because he only now has an 80 percent chance of victory. Oh, wait, he whines because he’s a wanker. I quickly have him choose one, and from that box, the ghost of a Heartless emerges and then disappears. Rosie’s all, “What the hell is that?!” and Junior tells her it’s proof that Alice didn’t do it. Let’s examine this chain of events, shall we?
– The Queen thinks Alice tried to steal her heart.
– Junior says Alice is innocent.
– Queen tells Junior to go find evidence to back up his statement.
– Junior finds four gift-wrapped boxes around the area, which may or may not be indicative of the Heartless at all, let alone of the heart theft.
– One box of “evidence” is opened, revealing a creature the Queen has never seen before, even though these were boxes of “evidence,” not of Heartless themselves.
– Junior says, “Ha! Told you she’s innocent!”
Excuse me while I have a Tightass moment: HUH?